How to Blur Videos with CapCut: A Step-by-Step Guide
CapCut is a free and easy-to-use video editing software that offers a variety of features, including the ability to blur videos. Blurring videos can be useful for protecting privacy, emphasizing specific elements, and creating transitions. In this article, we will show you three ways to apply blur effects in CapCut: how to blur the entire video, how to blur part of a video, and how to blur the video background. We will also provide 3 excellent alternatives to CapCut for applying blur effects to videos.

Part 1: How to Blur the Entire Video in CapCut?
Step 1: Import video
Open the CapCut app and create a new project. Select the video you want to edit and add it to your project.
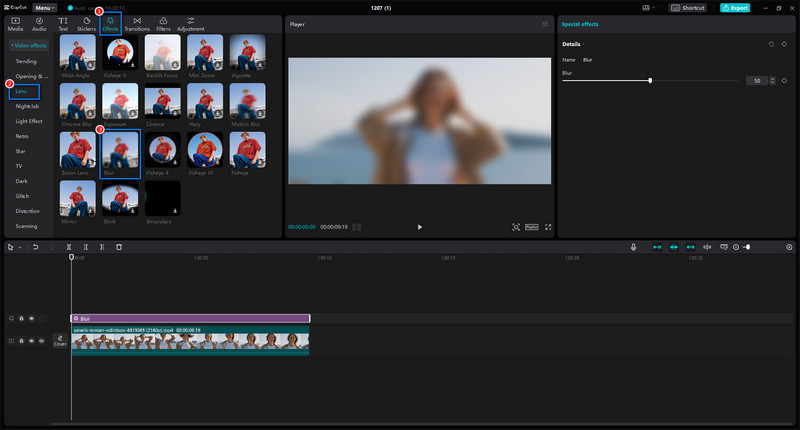
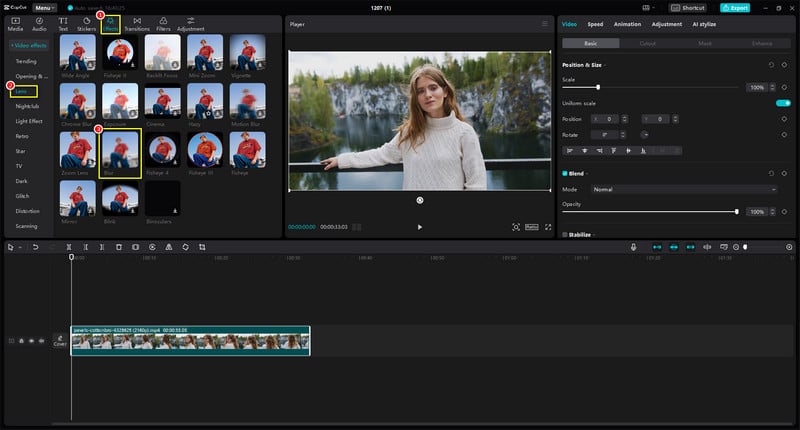
Step 2: Choose the Blur Effect
Start creating after dragging the video onto the timeline. Then, tap on the "Effects" icon at the bottom of the screen. You will see a list of categories, such as lens, trending, zoom, etc. Just Click Lens and scroll down to find the Blur Effect.
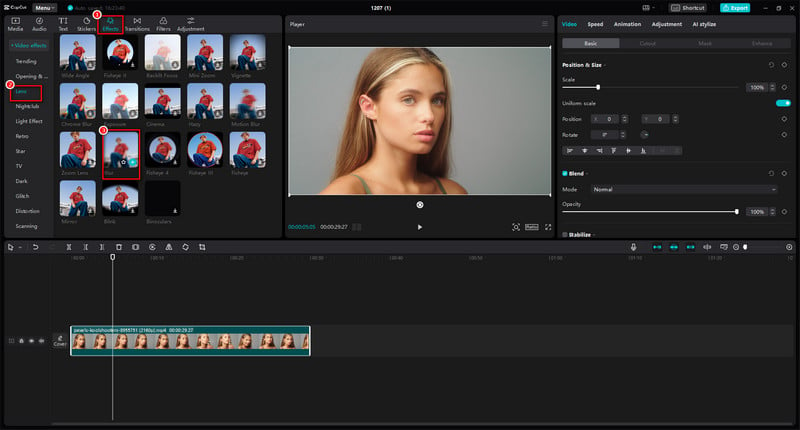
Step 3: Apply Blur Effect to the Entire Video
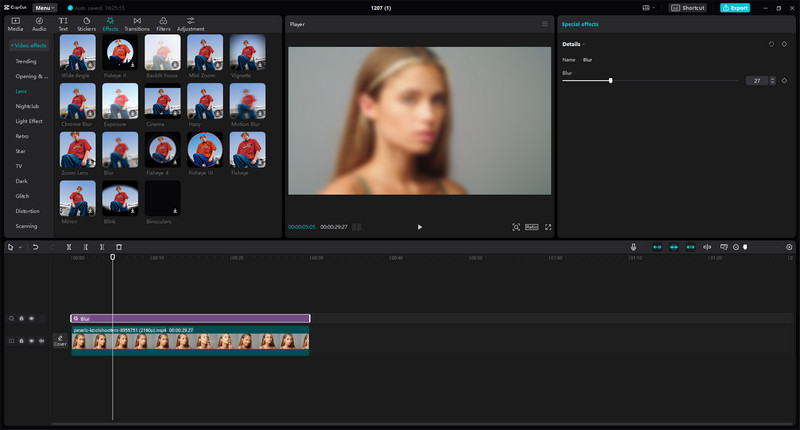
Drag and drop the blur effect above your video and adjust the length accordingly. You can also click on the Blur effect in the timeline to adjust the Blur intensity according to your needs.
Part 2: How to Blur A Specific Portion of the Video in CapCut?
Step 1: Import video
Launch CapCut and create a new project. Import the video you want to blur using the "+" icon or drag-and-drop method.
Step 2: Choose the Blur Effect
Start creating after dragging the video onto the timeline and tap it. Then, click Effects >Lens >Blur to select the Blur Effect.
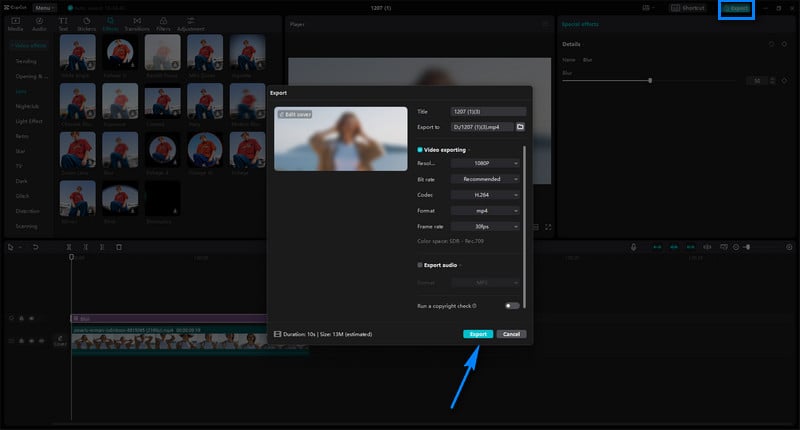
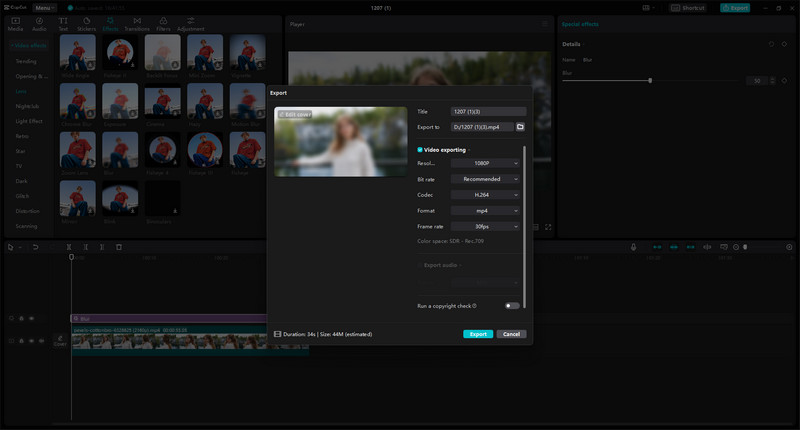
Step 3: Apply Blur Effect to the Video and Export
Drag and drop the blur effect above your video and adjust the length accordingly. You can also click on the Blur effect in the timeline to adjust the Blur intensity according to your needs. Then click Export.
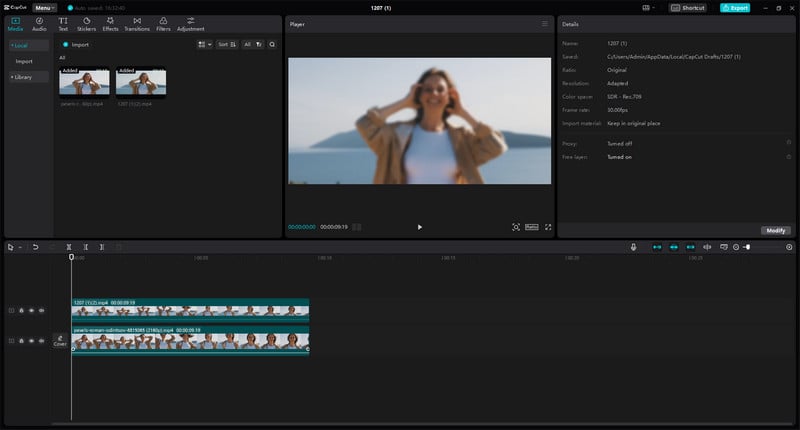
Step 4: Import the modified video again
Delete the blur effect and place the previously exported file above the original clip.
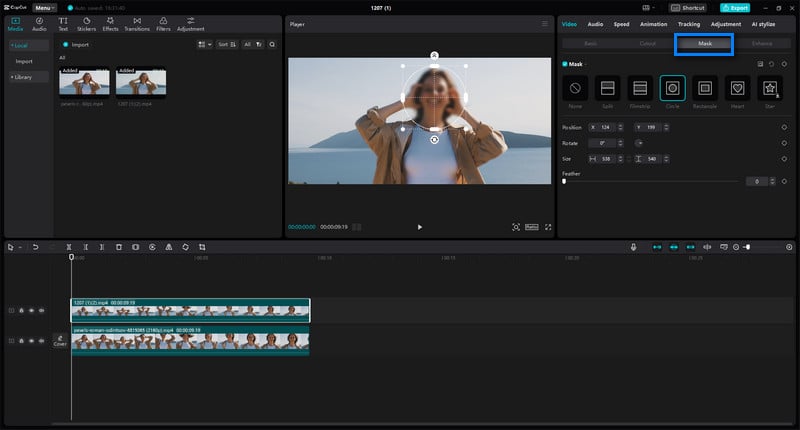
Step 5: Select the Mask to Blur Specific Portion
Select a suitable mask shape and you can change the position and size of the shape with Feather and Size.
Part 3: How to Blur Video Background in CapCut?
Step 1: Import video
Import the video you want to edit on CapCut's timeline by tapping on the plus icon (+) and selecting the video from your folder.
Step 2: Choose the Blur Effect
Tap on the video clip in the timeline. Then, click Effects >Lens >Blur to select the Blur Effect.
Step 3: Apply Blur Effect to the Video and Export
Drag and drop the blur effect above your video. Tap on it and you will see a slider that allows you to adjust the intensity of the blur effect. You can drag the slider to the right to increase the blur or to the left to decrease it. Then click Export.
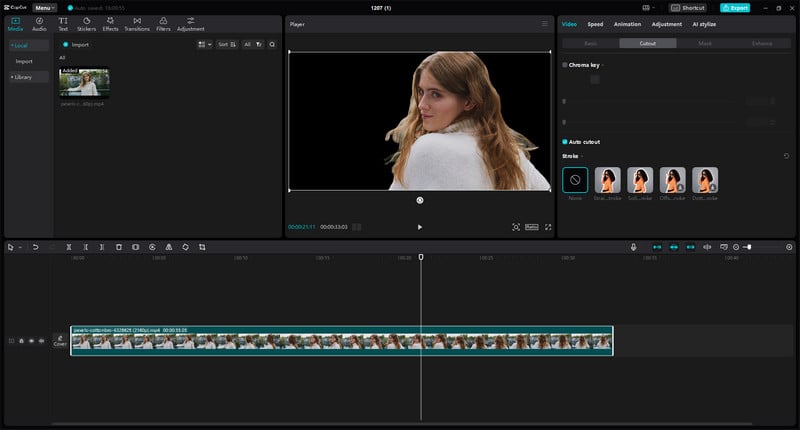
Step 4: Cutout the Background
Delete the blur effect in the timeline. Click on the video and select Cutout. Click Auto Cutout and the process will start automatically. After the processing is complete, you can see that the video background is removed and only the characters remain.
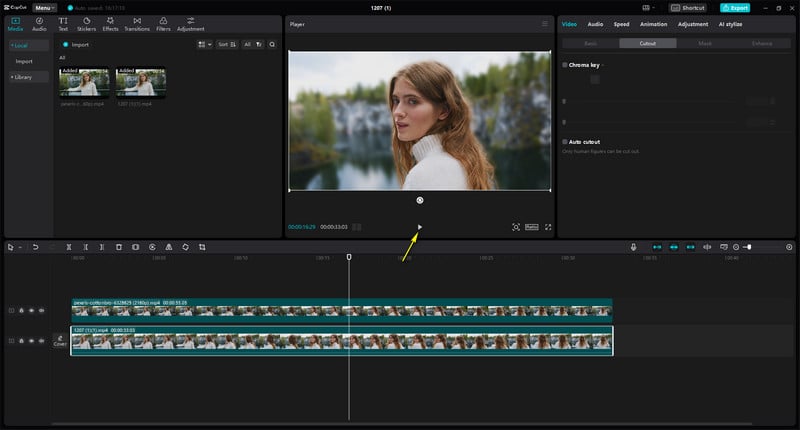
Step 5: Import the Modified Video Again
Import the previously exported file and place it below the original video. At this time, you can see that the video background is blurred. Just tap on the Play button to preview the video and see how the blur effect looks in the background.
Part 4: Alternatives to Capcut for Applying Blur Effect to Video
CapCut is a great video blurring software, but it's not the only one. There are other apps that can help you easily blur faces, objects, backgrounds, or entire videos. Some of these applications also employ artificial intelligence to automatically facilitate video blurring, enhancing efficiency and convenience.
| Name | Platform | Customization | Blur Types | Motion Tracking | Link |
|---|---|---|---|---|---|
| AVCLabs Video Blur AI | Windows and Mac | High | Multiple | Yes | Learn More |
| CapCut | Windows, Mac, iOS, Android | High | Basic | No | Learn More |
| iMovie | Mac, iOS | High | Basic | No | Learn More |
| Filmora | Windows and Mac | High | Diverse | Yes | Learn More |
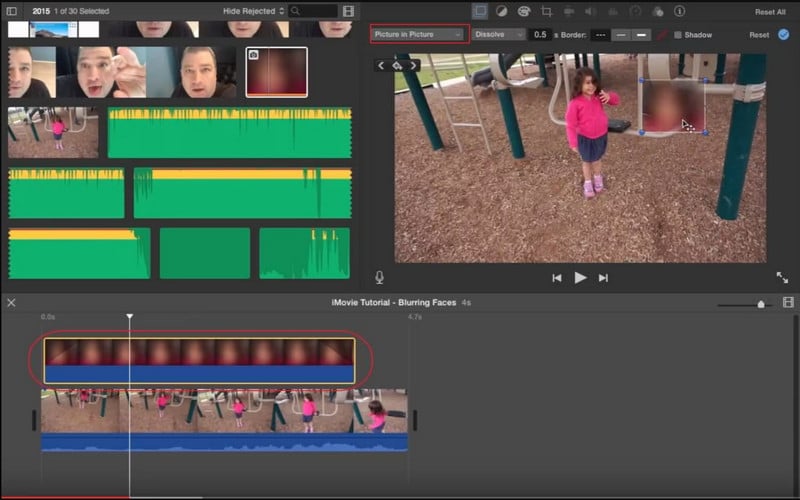
1. iMovie
iMovie serves as a user-friendly video editing tool tailored for Apple device users. Boasting a straightforward interface and an integrated blur filter, iMovie facilitates a swift and uncomplicated process for adding blur to your videos. iMovie allows you to fine-tune the blur strength, all within the familiar iMovie setting. If you're utilizing iOS or macOS, this included software stands as an excellent choice for your video editing needs.
Features:
- Quickly and easily apply a Gaussian blur effect to your videos.
- Control the strength of the blur effect to your desired level.
- Trim, split, merge clips, add titles, music, and sound effects.
- Edit your videos on your iPhone, iPad, or Mac.
iMovie vs CapCut
iMovie
CapCut:
Choose iMovie if:
Choose CapCut if:
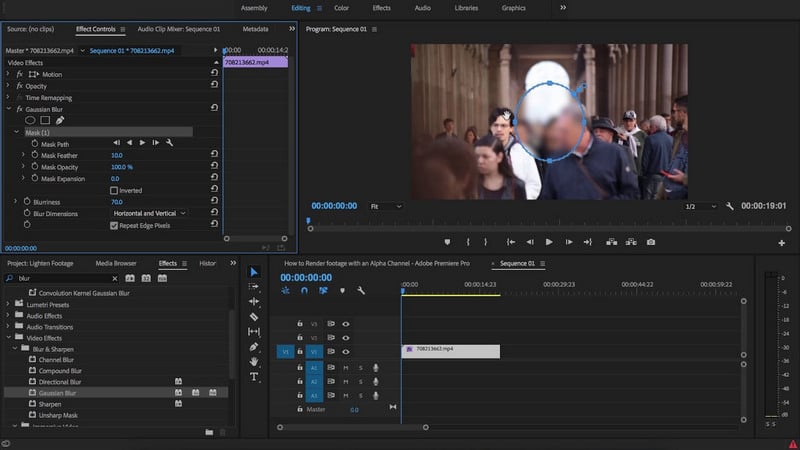
2. Filmora
Filmora provides a diverse range of blur tools designed to cater to your visual preferences. Whether you prefer a subtle Gaussian blur, dynamic motion blur, or creative radial blur, Filmora offers a variety of options. Additionally, you have precise command over factors such as blur intensity, shape, and animation, ensuring flawless results with every use. This robust and user-friendly software is compatible with both Windows and Mac operating systems.
Features:
- Adjust blur intensity, shape, size, position, and animation with keyframes.
- Apply blur to specific objects even as they move within the frame.
- Trim, split, merge, add transitions, titles, music, and more.
Filmora vs CapCut
Filmora
CapCut:
Choose Filmora if:
Choose CapCut if:
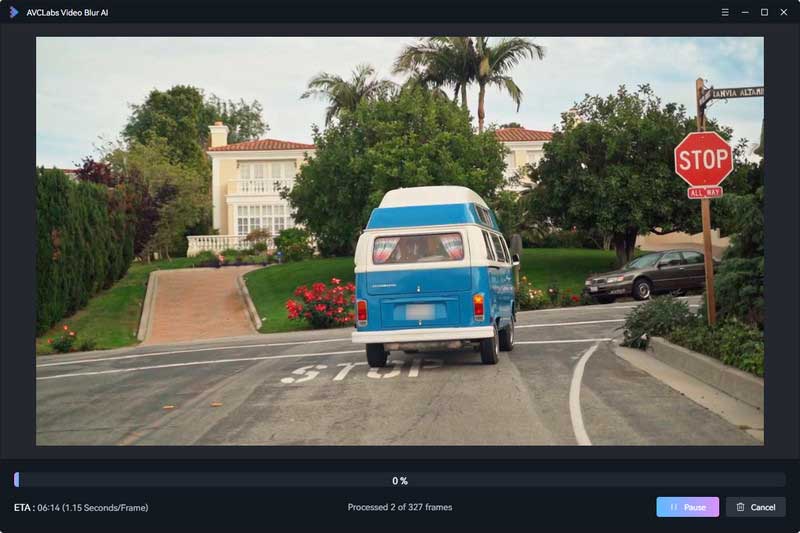
3. AVCLabs Video Blur AI
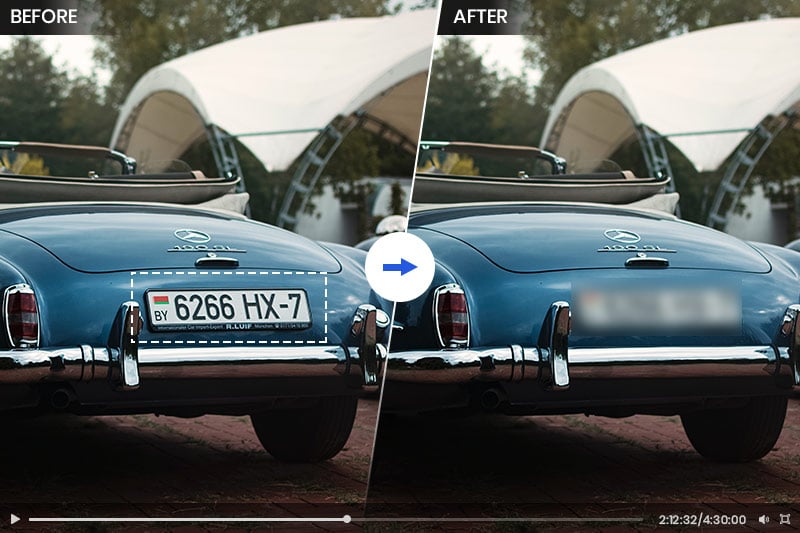
AVCLabs Video Blur AI is an innovative solution that eliminates the uncertainty associated with applying blur to videos. Driven by sophisticated artificial intelligence technology, AVCLabs simplifies the process of achieving impressive and lifelike blur effects. Whether your intention is to blur faces, video backgrounds, or license plates, simply select the relevant function, and let the AI take care of the rest. Say goodbye to the inconvenience of manual tracking.
Key Features of AVCLabs Video Blur AI
- Automatically detects and tracks license plate in videos for privacy protection
- Blur the detected faces selectively for single face or multiple faces in a video
- Blur or pixelate any parts you want to keep private in a video
- Automated blur solutions for face, back/foreground, object and license plates
AVCLabs Video Blur AI vs CapCut
AVCLabs Video Blur AI
CapCut:
Choose AVCLabs Video Blur AI if:
Choose CapCut if:
Conclusion
CapCut, with its user-friendly interface and versatile blur effects, provides a convenient platform for blurring videos. By following the methods outlined in this guide, you can effectively apply blur effects to your videos and achieve the desired visual style. Remember, there are also several advanced alternatives available, like AVCLabs Video Blur AI, Filmora, and iMovie, offering even more control and features for professional editing needs. Ultimately, the best choice depends on your specific goals and technical requirements.