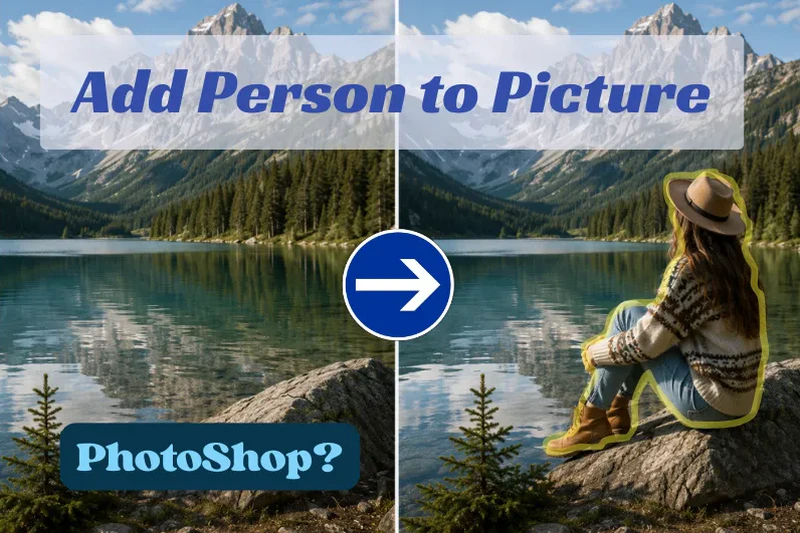
How to add someone to a picture, and it should be natural and harmonious? In the article, we share the best methods. Whether you want to use Photoshop to add, or you want to use AI to combine two photos, or remove people from photos, you can find tutorials here.
Most Powerful
Photoshop
Best for creative control over adding or removing people from photos.
Best for Creative Editing
Any Video Converter
Best for anyone who wants to blend people naturally using AI-generated prompts.
Guess You Like
AVCLabs PhotoPro AI
Best for quickly erasing unwanted people from photos safely on desktop.
Part 1: How to Add Someone to a Picture in Photoshop
Adobe has upgraded its Firefly model to the third generation (Firefly Image 3 Model), making masking and blending look incredibly seamless. We'll walk you through the step-by-step process of seamlessly adding a person to a photo using Photoshop.
Step 1: Examine the Photos
First, check both photos and consider the relative positions of the subjects. In other words, determine where the person would look most natural. Technically, you need to consider the subject's proportions, occlusion, perspective, and the plausibility of their stance. These factors will make the image look realistic.
Step 2: Cut Out the Subject
Use Quick Selection tool to cut out the subject. First, click and drag to select the person, hold down the Alt key to remove any incorrect selections, and finally refine the edges of the selection. This is a crucial step.
Step 3: Create a New Layer
Once the selection is complete, press Ctrl+J to copy the selected area to a new layer. This isolates the subject, making it easier to place them into another image later.
Step 4: Identify the Subject
If your second image contains only one person, use its AI-powered automatic subject recognition feature—a very common tool in modern Photoshop called “Select Subject.”
Step 5: Add a Layer Mask
Click “Mask” to add a Layer Mask. White reveals the image, while black hides it—this is the most basic step in the entire tutorial.
Step 6: Merge the Photos
Drag in the target photo, adjust the subject's size, and maintain the correct proportions. I recommend placing the original subject's layer on the topmost layer and the newly added subject on the layer below it. This creates a natural visual overlap, making the result look more realistic.
Step 7: Fine-Tune
Use a black brush tool to erase any excess edges on the layer mask created in Step 5, enhancing the sense of blending.
My Real Experience
Fine-tuning edges on hair and fingers takes a lot of patience. Even after all the careful blending, lighting differences between the two original photos can still make the final result look slightly off. "White reveals, black hides" can feel more confusing than helpful at first for me.
Pros
- Industry-standard tool with the most precise selection and masking controls available.
- Full manual control over lighting, shadows, color grading, and edge blending.
- Works for both simple composites and complex, professional-level edits.
Cons
- It requires a monthly Adobe subscription.
- Time-consuming even for experienced users.
- Not beginner-friendly at all.
Part 2: How to Add Someone to a Picture Without Photoshop
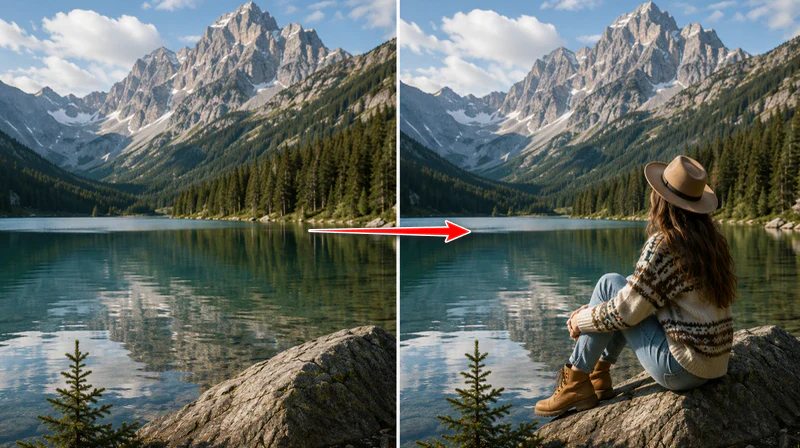
Any Video Converter has redefined how users approach creative photo editing. Driven by the powerful Seedream AI Image Generator, the platform turns complex composition into an effortless experience, allowing users to customize a subject's position, scale, and facial expression while achieving a flawless blend into any background.
Below is a step-by-step guide on how users can seamlessly add a person to a photo, enjoying a smooth, intuitive workflow that delivers professional-grade results in seconds.
Step 1: Download Any Video Converter
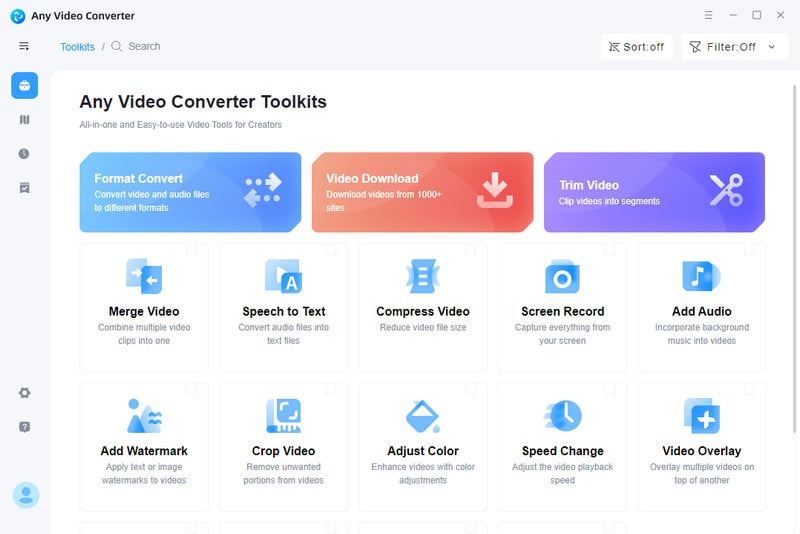
Download Any Video Converter for Windows or Mac. Once installed, open the program — you'll find the built-in Seedream AI Image Generator tucked inside the toolbox, no separate download needed.
Why We Recommend Any Video Converter
- Built-in Seedream AI Image Generator — no extra software needed.
- Import multiple reference photos and blend people into any scene naturally.
- Fully offline desktop tool, no account or internet connection required.
Step 2: Import your reference photos
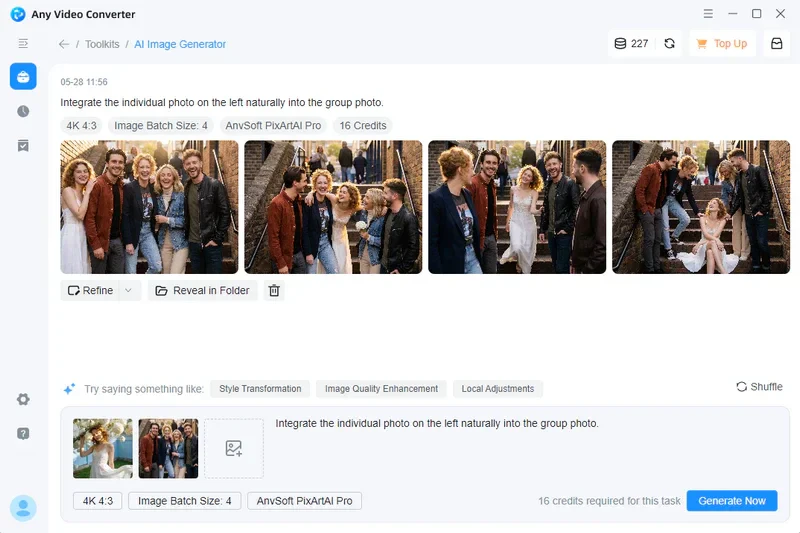
Click into AI Image Generator and import two or more photos. Typically you'll want one photo featuring the person you'd like to add, and one photo of the background scene or setting you want to place them into. The tool accepts standard formats like JPG and PNG.
Step 3: Write your prompt
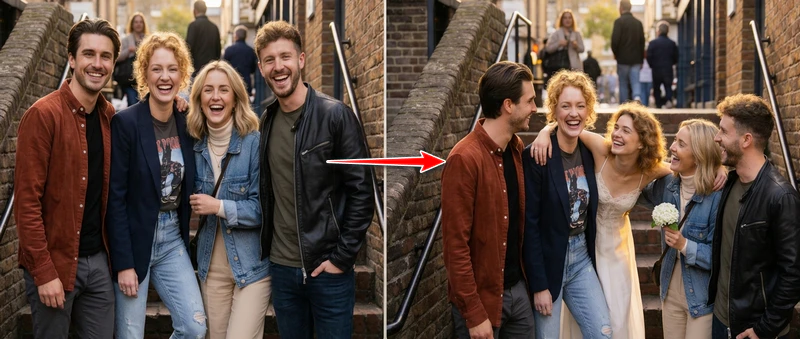
Describe how you want the person from the left image to appear in the right-side scene in the prompt box. You can just tell it to integrate these five persons into one picture as I do, and it can still offer a nice result.
If you want to be as specific as possible, you can mention the lighting, the person's posture and position ("standing slightly behind and to the right of the group"), and even their expression or mood can be a good prompt.
Step 4: Generate the image(s)
Click "Generate Now". It will process your inputs and blend the person naturally into the new scene. If the first result isn't quite right, tweak your prompt — adjusting the lighting description or repositioning details usually makes a noticeable difference.
My Real Experience
I wasn't expecting much the first time — AI compositing tools can be hit or miss. But AVC genuinely shocked me. I imported two photos, wrote a prompt with simple description, and the result looked convincingly real. The first attempt wasn't perfect using other tools. If you generate AI images always get bad results. Try to describe the light, the angle, and the mood. By the way, they offer free credits.
Pros
- Free to download with the Seedream AI Image Generator built right in.
- No design skills needed — just describe what you want in a prompt.
- Handles lighting and blending automatically for a natural result.
Cons
- Less precise than manual compositing in Photoshop.
- May require a few attempts to get the output just right.
Part 3: How to Remove Someone from a Picture for Free
Sometimes it's the opposite problem. Maybe there's an ex in a photo you'd rather forget, a random stranger who walked into the background, or just someone who didn't quite fit the shot. Whatever the reason, removing a person from a picture used to mean hours in Photoshop — but not anymore.
Here's how to do it for free in just a few clicks to remove people from photos.
Editor's Choice
AVCLabs PhotoPro AI
AVCLabs PhotoPro AI lets you remove any person or object from a photo in seconds — no Photoshop skills required. Just brush over what you want gone, and the AI handles the rest.
- One-click AI object and person removal with natural background.
- Smart selection brush that auto-detects edges precisely.
- AI background enhancer to fill removed areas seamlessly.
- Supports batch processing for editing multiple photos at once.
- Available on both Windows and Mac, fully offline and secure.
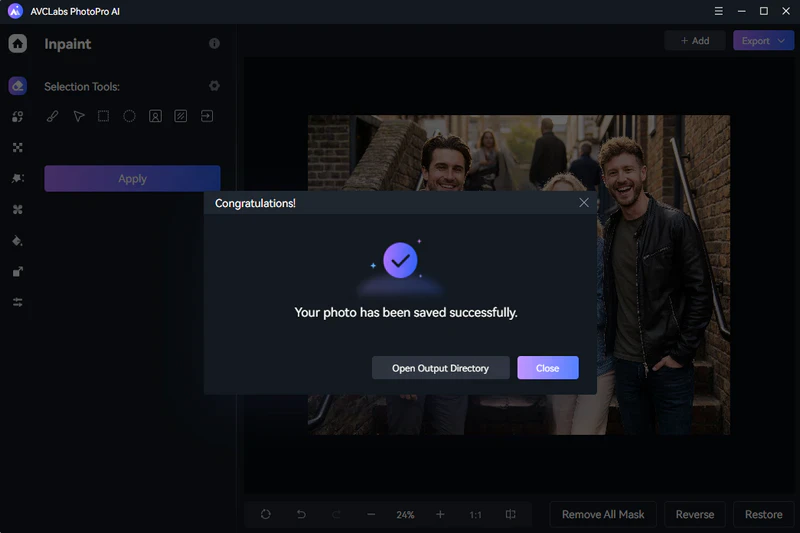
Step 1: Launch AVCLabs PhotoPro AI
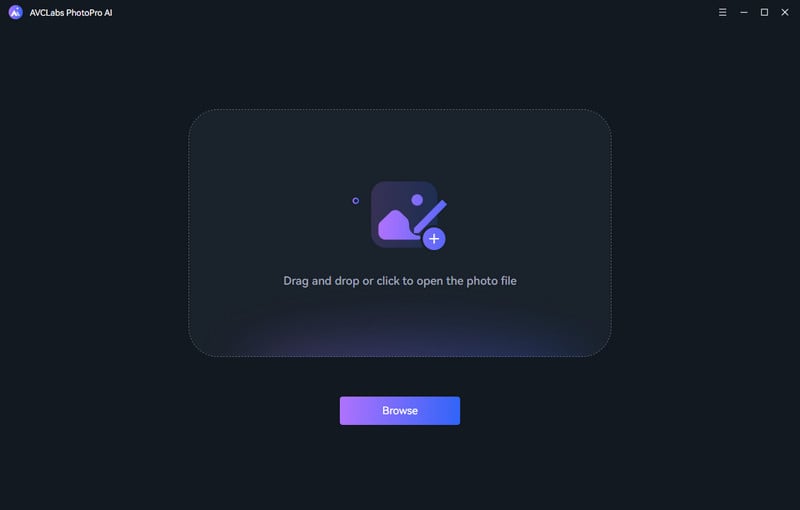
Install and launch PhotoPro AI for free on Windows or Mac. Then click "Browse" to add the photo you want to edit. Or, drag and drop the image is allowed.
Step 2: Select the person or object to remove
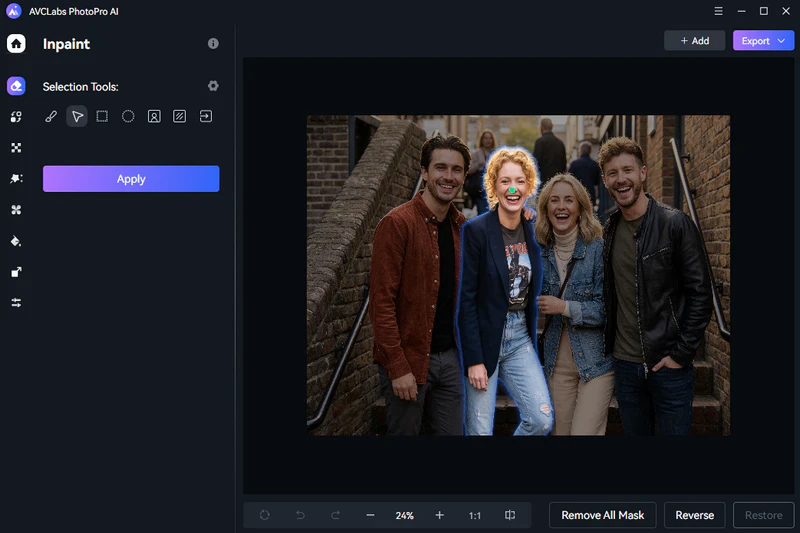
Switch to "Inpaint" mode and use the built-in selection tools to brush over the person you want to remove from the photo. It also features a smart recognition capability. I added a marker on her nose, and it precisely detected and highlighted the subject.
Step 3: Remove and let AI fill the background
Click "Apply" and PhotoPro AI will instantly erase the selected area, then intelligently reconstruct the background behind it. The result looks natural without any manual retouching needed. Finally, click "Export" to save this image.
My Real Experience
Honestly, this one surprised us. You just brush over the person you want to remove, hit a button, and the AI fills in the background like they were never there. We tested it on a group photo with a complex background and the result came out still natural. However, it's not perfect on very complex backgrounds.
Pros
- One-click to remove any unwanted elements, like watermarks and people.
- Simple interface that anyone can pick up in minutes.
- Works completely offline with no account required.
Cons
- Free trial outputs include a watermark.
How to Make the Edit Look Natural (Image Compositing Tips)
Getting the cut right is only half the job. Here are a few quick tips to make your composite look like it was always one photo.
- Match the light direction. If the light in the background scene comes from the left, make sure the person you're adding is also lit from the left. Mismatched shadows are the number one thing that gives a composite away.
- Unify the color tone and white balance. A warm golden-hour background with a cool-toned portrait will never look right. Adjust the brightness, warmth, and saturation of both images until they feel like they belong in the same world.
- Add a subtle shadow. Even a soft, slightly transparent shadow beneath the person's feet goes a long way. Without it, they'll look like they're floating — and your brain immediately knows something's off.
- Soften the edges. Hard cutout edges scream "copy and paste." Use feathering or a soft brush to slightly blur the edges of the added person so they blend into the scene instead of sitting on top of it.
AVCLabs PhotoPro AI - Quick Specs
AVCLabs PhotoPro AI can easily handle the above image compositing tips totally offline with its advanced tuning and removal features.
| Object Removal |
AI automatically removes people, watermarks, or anything you don't want in the photo — and fills in the background so it looks like they were never there. |
| Edge & Mask Control |
Easily select exactly what you want to keep or remove, with smooth edge blending so nothing looks cut out or unnatural. |
| Color & Tone Adjustment |
Adjust brightness, contrast, and color so everything in the photo looks balanced and consistent. |
| Supported Formats |
JPG, PNG, BMP, TIFF, WEBP, HEIC, DNG and more. |
| Platform |
Works on Windows 10/11 (64-bit) and macOS 12 or later. No internet connection needed. |
Part 4: How to Add Someone to a Photo FAQs
Can I add someone to a picture for free?
Import your photos in Any Video Converter, write a prompt describing how you want the person to appear, and click to generate.
How can I add someone to a picture on iPhone?
You can use the built-in Photos app on iOS 16 or later — press and hold on a person in any photo to lift them out, then paste them into another image. For more precise blending, apps like PicsArt or Photoleap give you better control over positioning and lighting.
How to add someone into a picture without Photoshop?
Any Video Converter's built-in Seedream AI Image Generator lets you import two photos and use a text prompt to blend a person naturally into a new scene — no design skills or subscription needed.
How can I cut out a person from a photo?
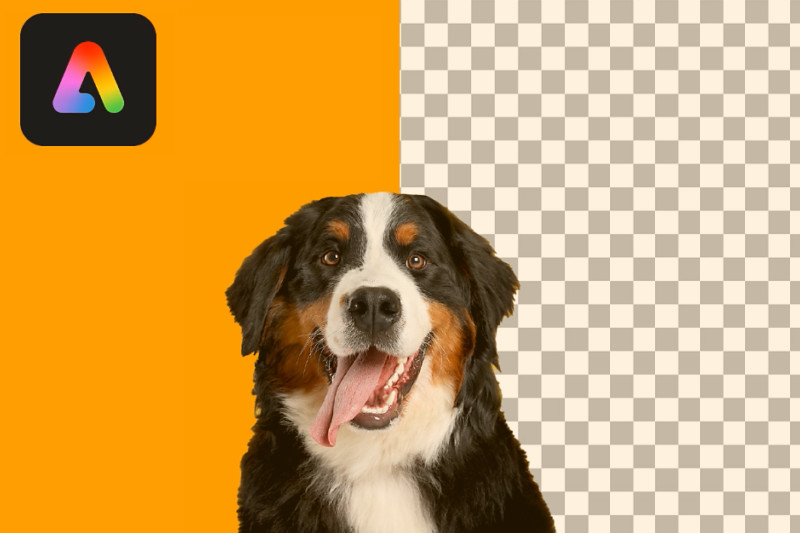
AVCLabs PhotoPro AI makes this easy. Open your photo, brush over the person you want to remove, and click Remove. You can easily make a picture with transparent background.
Is there any way to make the added person look natural?
Match the light direction, unify the color tone, soften the edges, and add a subtle shadow beneath the person's feet. These small adjustments make a big difference between a obvious composite and a convincing one.
How can I add someone to a picture if I don't want to use AI?
Photoshop is still the go-to option for manual compositing. Use the Pen Tool or Quick Selection to cut out the person, paste them into the new photo, then manually adjust the lighting, color, and shadows to make everything blend together.
Conclusion
We believe “adding someone to a picture” is a meaningful form of photo editing, because it's often about preserving family memories and reconnecting with loved ones—especially those who couldn't be there or are no longer with us. Ready to give it a try?
Billie Miller
AI Product Content Strategist
Billie covers AI-powered photo editing tools and creative workflows. She tested each tool hands-on to bring you the clearest, most practical guide possible.








 Sherry Johnson
 September 11, 2025