How to Fix the Constant Crash Issue After Update to V3.0.0
If you are experiencing constant crashes (after the last update to V3.0.0) when trying to process videos, and the video enhancement is not getting complete, you can try to change the virtual memory size on Windows 10 and Windows 11 to fix this issue.
Here is how to adjust the virtual memory size on Windows 10 and Windows 11 to improve the system responsiveness.
1. Go to the Start Menu and click on Settings.

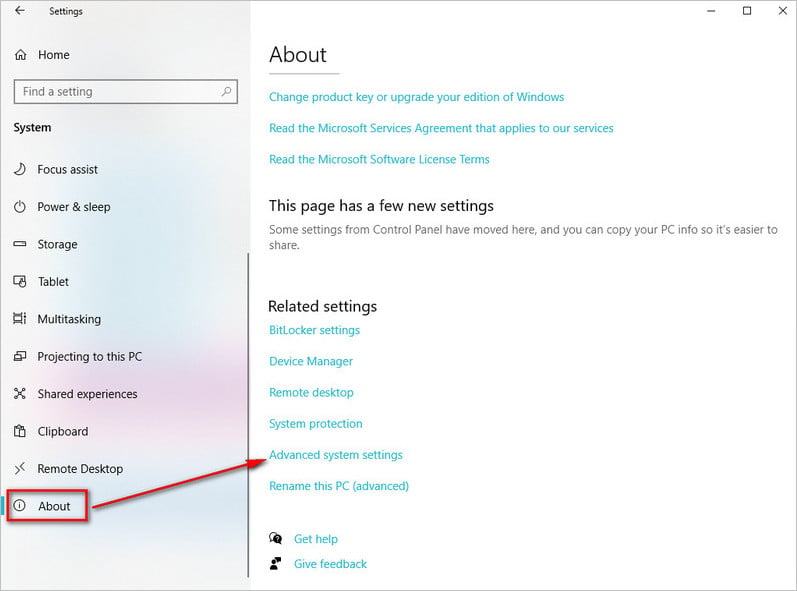
2. Click on the System -> About -> "Advanced system settings" option from the left pane.
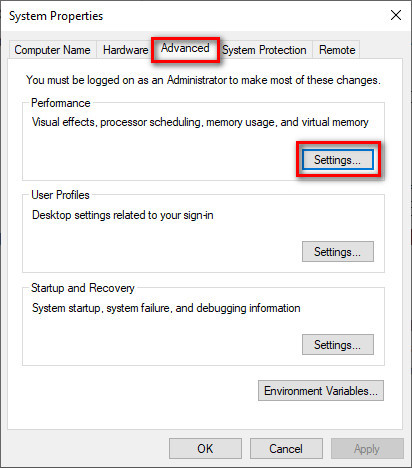
3. Click the Advanced tab. Under the "Performance" section, click the Settings button.
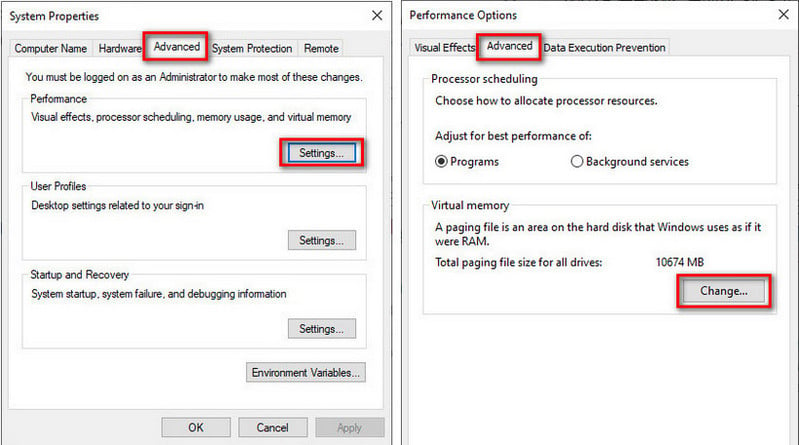
4. Click the Advanced tab. Under the "Virtual memory" section, click the Change button.
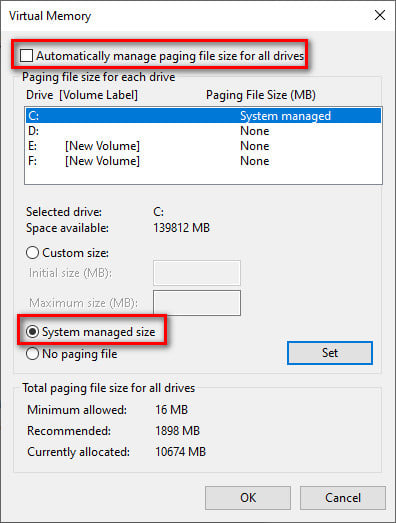
5. Clear the "Automatically manage paging files size for all drives" option.
1) If your computer's space available is more than 32GB, select the "Custom size" option. Set the Initial size (MB) to 16000, and the Maximum size (MB) to 32000.
Tips: It's recommended to use a number that's one and a half times the total available memory for the "Initial size" and three times of available memory for the "Maximum size" when possible.
2) If your computer's space available is less than 16GB, select "System managed size".
Warning: Do not select "no paging file".
6. Click the Set button.
7. Click the OK button.
8. Click the OK button again.
9. Restart your device and re-launch the program to see if the problem was fixed.